2026 Best LED High Bay Light for Warehouses
Choosing the 2026 best LED high bay light for a warehouse is not just about finding the brightest fixture. A well-matched Led High Bay Light should suit the ceiling height, aisle layout, work tasks, and operating schedule. In a tall distribution center, a narrow beam may help illuminate long aisles. In an open workshop, broader light distribution can reduce dark patches between racks. Details matter.
This guide compares practical features rather than relying on one headline specification. It looks at light output, efficacy, color quality, beam angle, dimming options, and installation needs. It also considers housing materials, thermal management, warranty terms, and available test documentation. A fixture’s real performance depends on its environment and setup. Dust, heat, mounting height, and switching frequency can all affect results. Check product data carefully.
Numbers can help, but they do not tell the whole story. A high lumen rating alone cannot promise even light across a warehouse floor. Nor does a low purchase price guarantee lower long-term costs. A lighting professional can assess spacing and target light levels before replacement, especially where workers handle small labels or inspect product surfaces. Still, calculations are only as useful as their assumptions. That deserves a second look. The recommendations ahead are intended to help facility managers compare options with care, ask better questions, and identify trade-offs before investing. The best choice may not be the most powerful fixture; it may be the one that delivers consistent, comfortable light where people need it.
What LED High Bay Lights Are and How Warehouses Use Them
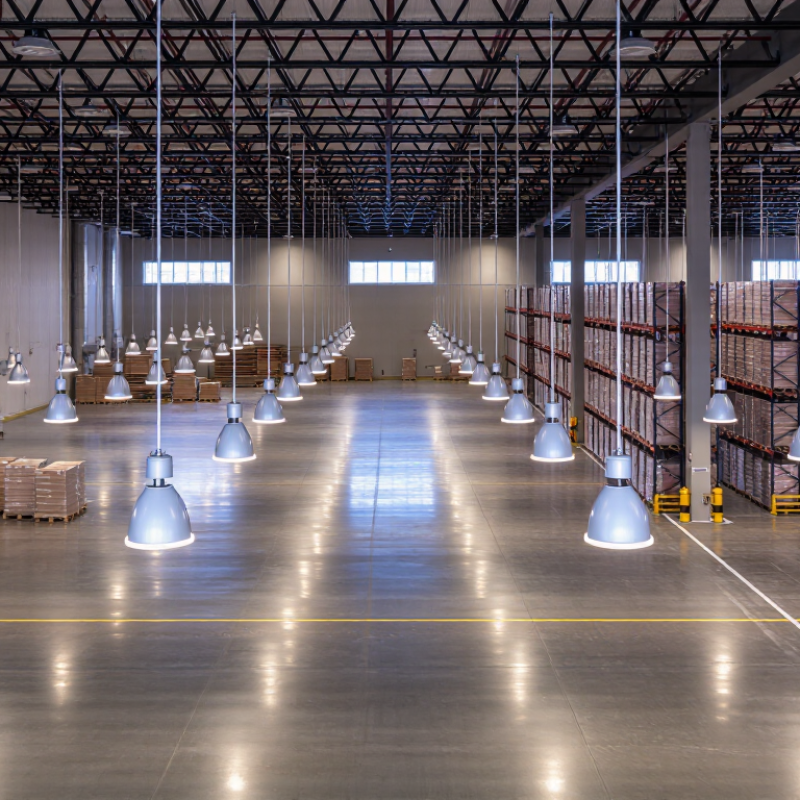
LED high bay lights are fixtures designed for spaces with tall ceilings, commonly around 6 metres or higher. Their optics direct light down across racks, loading lanes, and work areas, reducing wasted light on upper walls. Warehouses use them for general illumination, often in rows aligned with aisles. A wide beam suits open floor areas; a narrower distribution can help reach the floor between tall shelves.
The U.S. Department of Energy’s 2022 Solid-State Lighting R&D Opportunities report notes that laboratory LED packages have exceeded 200 lumens per watt. That is not the same as a finished fixture: drivers, lenses, and heat management reduce delivered performance. In practice, fixture layout matters as much as the headline efficacy. Sensors can dim or switch lights in empty aisles, while daylight controls adjust output near skylights. The details are easy to miss. A poorly aimed high bay can leave dark patches at pallet level, even when the floor looks bright. Site measurements and a careful trial layout help, though they cannot replace checking the actual work tasks and rack arrangement.
Key Performance Features to Compare in 2026
Choosing a high bay fixture starts with the warehouse itself, not a headline lumen figure. Measure ceiling height, aisle width, and shelf depth before comparing output. A 30-foot ceiling needs a different beam pattern from a low packing area. Check delivered lumens and optical distribution together; bright floors can still leave upper shelves dim. One detail is easy to overlook. Ask for photometric files or a layout showing expected light levels across the actual space.
Compare efficacy, color quality, and glare in context. Higher lumens per watt can reduce energy use, but only if the light reaches working surfaces efficiently. A CRI of 80 or higher is a common starting point for general storage, while color-critical inspection may need better color rendering. Review flicker data, especially near cameras or moving equipment. Dimming and occupancy controls can help in low-traffic zones, though poorly tuned sensors may leave aisles dark at inconvenient moments. That happens. Check ambient-temperature ratings, surge protection, and the warranty terms, not just the fixture’s listed life. A tidy specification sheet cannot predict every shadow or maintenance issue; a mock-up in one representative aisle is often worth the effort.
2026 Best LED High Bay Light for Warehouses - Key Performance Features to Compare in 2026 | Performance Feature | Standard Warehouse High Bay | High-Efficacy High Bay | Controls-Ready High Bay |
| Typical input power | 100–240 W | 100–240 W | 100–240 W |
| Typical delivered light output | 15,000–36,000 lm | 18,000–43,000 lm | 15,000–40,000 lm |
| Fixture efficacy | 130–160 lm/W | 160–190 lm/W | 140–180 lm/W |
| Common correlated color temperature (CCT) | 4000 K or 5000 K | 4000 K or 5000 K | Selectable or fixed, commonly 4000 K or 5000 K |
| Color rendering index (CRI) | Typically ≥80 | Typically ≥80; higher-CRI options may be available | Typically ≥80 |
| Common beam distributions | Approximately 60°, 90°, or 120° | Approximately 60°, 90°, or 120° | Approximately 60°, 90°, or 120° |
| Ingress protection | Often IP20–IP65, depending on the fixture | Often IP20–IP65, depending on the fixture | Often IP20–IP65, depending on the fixture |
| Rated operating life | Commonly 50,000 hours or more; check the stated lumen-maintenance rating | Commonly 50,000 hours or more; check the stated lumen-maintenance rating | Commonly 50,000 hours or more; check the stated lumen-maintenance rating |
| Power factor and harmonics | Compare published values; PF ≥0.90 is a common selection target | Compare published values; PF ≥0.90 is a common selection target | Compare published values; verify compatibility with controls and the electrical system |
| Dimming and controls | May be non-dimming or offer 0–10 V dimming | May offer 0–10 V dimming; confirm the driver specification | Designed for dimming and may support occupancy or daylight sensors; verify the control protocol |
| Best suited to | General warehouse lighting where upfront cost is a priority | Long operating hours where reducing watts per delivered lumen is a priority | Areas where occupancy-based dimming or lighting schedules are needed |
Typical comparison ranges only—not product guarantees. Actual performance varies by fixture, optics, driver, ambient temperature, and test method. Check independent photometric data, installation height, spacing, mounting conditions, warranty terms, and local electrical requirements before selecting a fixture.
How to Match Light Output and Beam Angle to Warehouse Layouts
2026 Best LED High Bay Light for Warehouses
How to Match Light Output and Beam Angle to Warehouse Layouts
Match the light distribution to the actual floor plan, not just the fixture’s lumen rating. A broad, open storage area may benefit from wider beams and overlapping coverage. Tall racks and narrow aisles often need more focused light directed down the travel paths. Check mounting height, shelf depth, and aisle width before choosing an optic. Small gaps matter. Use a photometric layout to estimate maintained light levels, accounting for dirt buildup and light loss over time.
A nominal 90-degree beam can work in many layouts, but it is not a universal answer. At greater mounting heights, a narrower beam may concentrate light on the floor; it can also leave rack faces dim if aimed poorly. Wider beams can improve coverage between shelves, though excess overlap may create glare. Consider where workers read labels, pick cartons, and move equipment. Those tasks need useful, even illumination—not simply more lumens. Real layouts are messy, so verify the plan against actual rack dimensions.
Tips: Compare fixture photometric files at the planned mounting height. Check floor and vertical-surface readings, then adjust spacing or optics where dark bands appear. A small mock-up can reveal issues a drawing misses.
LED High Bay Fixture Types and Their Best Warehouse Applications
2026 Best LED High Bay Light for Warehouses
LED High Bay Fixture Types and Their Best Warehouse Applications
The right high bay fixture depends on ceiling height, rack layout, and the work below. UFO-style fixtures suit open warehouse floors with tall ceilings. Their compact shape can provide broad, concentrated light over receiving zones or storage bays. Linear high bays work well above long aisles. Their elongated distribution can reduce dark patches between shelving rows. Neither type is automatically better. A narrow beam may leave aisle edges dim, while a broad beam can create glare on glossy packaging.
For dusty or occasionally damp areas, consider fixtures with suitable ingress protection and sealed construction. Check the product’s specifications rather than assuming every high bay is protected. Compare mounting height, beam distribution, and spacing on a lighting plan. For example, a 9-meter ceiling and 3-meter aisles need a different layout from an open loading area. Dimming and occupancy controls may help in zones with intermittent activity, but sensor placement matters. It is easy to overlook shadows from tall racks.
Tips: Mock up one aisle before ordering for the whole building. Check light levels at floor and picking height, not just beneath each fixture. If workers report glare, revisit aiming and spacing; more output is not always the fix.
Installation, Controls, and Maintenance for Long-Term Performance
For long-term warehouse performance, design around the work below each fixture. Measure mounting height, aisle width, rack height, and task areas before setting spacing. A neat floor plan can miss shadows from full pallet racks; verify the layout with a photometric model, then check light levels after installation. Aim fixtures along aisles where practical, and use suitable optical distributions to reduce dark bands and glare. Small details matter. Record initial readings so later changes are easier to diagnose.
Controls need commissioning, not just wiring. Group fixtures by aisle or daylight zone, then test occupancy sensors from floor level and at the edges of their coverage. Set timeouts to match actual picking patterns; overly short delays can annoy staff and encourage manual overrides. A Lawrence Berkeley National Laboratory meta-analysis reported median energy savings of about 24% from occupancy sensors across commercial buildings. That is useful context, not a warehouse guarantee. Rack geometry and operating schedules change results.
Tips: Clean lenses on a planned schedule, inspect for loose connections, flicker, or failed drivers, and compare readings with the installation baseline. Have qualified personnel isolate power before servicing. Keep a simple maintenance log. I may be overvaluing tidy commissioning records here, but missed notes make recurring failures harder to trace.
