Choosing the right rubber dust boot is a small decision with serious mechanical consequences. A poor match can invite dust, water, grit, and premature joint wear. The damage may remain hidden until steering becomes loose or movement feels rough.
Dr. James E. Mark, a respected rubber scientist and co-editor of Science and Technology of Rubber, described rubber as capable of “very large deformations with little change in stress.” That behavior explains why a rubber dust boot must flex repeatedly without splitting. It also explains why appearance alone can mislead. A thick boot is not automatically stronger. Material compound, temperature resistance, sealing shape, and installation quality matter just as much.
These seven practical tips focus on real selection problems. They examine boot dimensions, rubber type, flexibility, environmental exposure, clamp fit, grease compatibility, and expected service life. A boot used near hot brakes faces different demands than one protecting an outdoor suspension joint. Measure the groove carefully. Check the full movement range. Small errors matter.
Do not trust marketing language blindly. “Universal fit” can be convenient, but it may leave a narrow sealing lip poorly supported. That weakness often appears later. Sometimes the cheapest option survives well. Sometimes it does not. The difference usually comes from operating conditions, not luck.
A reliable rubber dust boot should remain flexible, sealed, and stable throughout movement. Inspect the working environment before choosing the part. One overlooked detail can undo an otherwise careful repair.
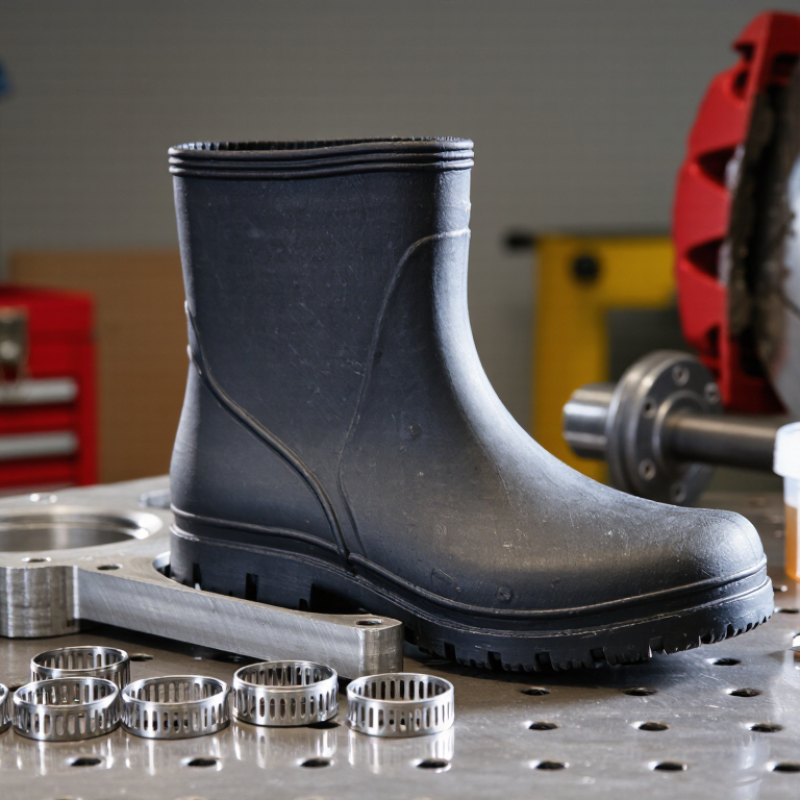
Choosing a rubber dust boot starts with understanding its real working environment. A boot protecting a steering joint faces different demands from one covering a linear shaft. Check the movement type, shaft diameter, available space, and expected travel before comparing materials.
Decide whether the boot will cover rotation, oscillation, compression, or repeated extension.
Include minimum and maximum lengths, not only the installed size.
Dust, mud, water, metal chips, and road salt require different protection levels.
Fine abrasive dust can enter through surprisingly small gaps.
Heat near an engine or furnace may harden ordinary rubber.
Oil, grease, cleaning fluids, and coolant can cause swelling or cracking.
Ozone, sunlight, and freezing temperatures can shorten service life.
A boot may fit on paper but rub against nearby parts during full movement.
In maintenance work, I have seen failures caused by overlooked stroke length rather than poor rubber quality. That detail matters.
Select a compound compatible with the environment, then confirm flexibility at actual operating temperatures.
Pressure should also be considered carefully, because many dust boots are not designed as pressure seals.
A practical trial installation can reveal rubbing, twisting, or trapped water before production use.
Perfect prediction is difficult, and field inspection still deserves attention.
7 Tips for Choosing the Right Rubber Dust Boot
Match Material Properties to Heat, Chemicals, and Environmental Exposure
A rubber dust boot is a barrier, not just a flexible cover. Field inspections often reveal cracked boots near hot housings, where temperatures exceed the material’s working range. Check continuous temperature, short-term peaks, and nearby heat sources before selecting rubber. ASTM D2000 helps classify rubber compounds by performance requirements, while ASTM D573 evaluates aging after heat exposure. A boot that survives room temperature may still harden after repeated thermal cycles.
Chemical exposure requires equal attention. ASTM D471 measures rubber volume and property changes after fluid immersion. Compare the test fluid with the actual environment, including grease, hydraulic oil, solvents, and cleaning agents. A compound may resist oil but swell in a detergent mixture. Small differences matter. Confirm hardness change, tensile strength retention, and volume swell data from the supplier’s test report.
Outdoor conditions add another layer. The World Meteorological Organization reported that 2023 was the warmest year recorded, increasing concern about heat and ultraviolet exposure. Ozone, salt spray, dust, and moisture can accelerate surface cracking. Consider an ozone-resistant compound for exposed equipment, and verify performance using relevant ISO or ASTM testing. Do not rely on color or thickness alone. I have seen thicker boots fail earlier because the material was poorly matched. The selection process is imperfect; real exposure records should challenge the original specification.
| Tip | Selection Focus | Typical Material Choice | Typical Continuous Service Temperature | Resistance Profile | Best-Fit Exposure | Important Limitations |
|---|---|---|---|---|---|---|
| 1Start with operating temperature | Confirm the lowest and highest continuous temperatures, plus short-term peaks. | Silicone rubber | Approximately −60 to +200°C | Excellent temperature flexibility | Cold starts, hot engine compartments, and wide temperature cycling. | Limited resistance to abrasion, tearing, and many petroleum-based oils. |
| 2Match the boot to oil and fuel exposure | Identify contact with mineral oil, hydraulic fluid, fuel, grease, or transmission fluid. | Nitrile rubber (NBR) | Approximately −30 to +120°C | Very good oil and fuel resistance | Automotive joints, hydraulic equipment, and lubricated mechanisms. | Weaker resistance to ozone, sunlight, and weathering unless specially compounded. |
| 3Check exposure to sunlight and ozone | Consider outdoor storage, UV radiation, ozone, rain, and changing weather conditions. | EPDM rubber | Approximately −50 to +150°C | Excellent weather, ozone, and water resistance | Outdoor machinery, water systems, and exposed suspension or linkage components. | Poor compatibility with petroleum oils, fuels, and many hydrocarbon fluids. |
| 4Evaluate chemical compatibility | List all cleaning agents, acids, alkalis, solvents, and process chemicals that may contact the boot. | Fluoroelastomer (FKM) | Approximately −20 to +200°C | Excellent resistance to many oils, fuels, and chemicals | High-temperature chemical environments and petroleum-fluid exposure. | Less flexible at low temperatures; hot water, steam, and some polar chemicals can be problematic. |
| 5Consider abrasion and flexing | Assess repeated articulation, rubbing, impact, grit, and mechanical wear. | Natural rubber (NR) | Approximately −50 to +80°C | Excellent elasticity and abrasion resistance | Frequently flexing joints and applications requiring high tear resistance. | Poor resistance to oils, fuels, ozone, and prolonged outdoor exposure. |
| 6Account for low-temperature flexibility | Ensure the boot remains flexible during cold storage, startup, and outdoor operation. | Chloroprene rubber (CR) | Approximately −40 to +120°C | Good weathering, ozone, and moderate oil resistance | General-purpose outdoor equipment with moderate chemical exposure. | Not the preferred choice for continuous contact with fuels or strong solvents. |
| 7Verify fit, sealing, and installation movement | Check shaft diameter, groove dimensions, compression, stroke, angular movement, and ventilation needs. | Application-specific elastomer compound | Based on selected compound | Performance depends on design and compound | Dust, water, mud, and debris protection where geometry and movement are critical. | Even the correct rubber can fail if stretched, pinched, twisted, over-compressed, or improperly clamped. |
Reference note: Temperature ranges are typical continuous-service values for common rubber compounds and may vary with formulation, pressure, exposure time, mechanical strain, and manufacturer specifications. Always validate chemical compatibility and dimensional fit before final selection.
7 Tips for Choosing the Right Rubber Dust Boot?
Choosing the right rubber dust boot starts with accurate measurement, not appearance alone. Measure shaft diameter, housing diameter, installed length, and available compression space. Use calipers on clean surfaces, then record measurements in millimeters. A small error matters. Do not measure a stretched or damaged boot. I once approved a replacement by outside diameter alone. It fit the housing but pinched the moving rod during travel. That mistake showed why installation conditions matter as much as catalog dimensions.
Check the boot’s shape against the component’s movement. A bellows boot needs room to fold without rubbing, twisting, or bottoming out. For sliding shafts, confirm the maximum stroke and smallest bend radius. For rotating parts, inspect clearance through a complete revolution. Move the assembly by hand, if safe, and watch for contact points. Look for nearby bolts, edges, springs, and heat sources. A neat static fit can fail dynamically.
Compatibility also depends on material, temperature, dust type, and exposure to oil or moisture. Ask for technical data, dimensional drawings, and test conditions from a qualified supplier. Do not rely on a generic “universal” label. Compare the attachment method with the actual groove, clamp, or flange. Leave enough retention without overstretching the rubber. After installation, cycle the component slowly and inspect fold patterns. Uneven folds often reveal misalignment. I still recheck clearances after the first operating cycle, because rubber can settle unexpectedly.
7 Tips for Choosing the Right Rubber Dust Boot?
Evaluate Sealing Performance, Flexibility, and Mechanical Durability
A dust boot should block grit, water, and grease without restricting movement. Check the sealing lip under compression, not only on a clean sample. ISO 20653 testing classifies protection against dust and water, while ISO 16750 evaluates environmental loads for vehicle components. These standards provide useful reference points, but they do not replace application-specific testing. A boot may pass a laboratory test and still leak after poor installation.
Flexibility matters when a joint articulates repeatedly. Measure the boot at its smallest and largest operating angles. Look for smooth folding, even wall thickness, and no sharp creases near the clamp. ISO 815-1 compression-set data can reveal whether rubber will recover after long compression. Lower permanent deformation usually supports better sealing. Usually, but not always. Material formulation and temperature can change the result.
Mechanical durability needs more than a thick wall. Review abrasion resistance, tensile strength, tear resistance, ozone exposure, and thermal aging. ASTM D395, ASTM D412, and ASTM D624 are commonly used reference methods for these properties. Smithers’ 2024 rubber industry outlook identifies durability and sustainability as continuing priorities in component development. Choose a boot tested near its real temperature range, speed, and contamination level. I have seen thick boots fail early because clamps cut the neck. Inspect clamp edges, shaft finish, and grease compatibility before approval. Small details decide service life.
Choosing the right rubber dust boot starts with quality, but quality is more than thickness. In field inspections, I check compound flexibility, tear resistance, and molding consistency. Look for clean edges, even walls, and no visible pinholes. A boot should remain flexible in the expected temperature range. It must also resist grease, water, road salt, and ordinary cleaning chemicals. Cheap rubber can harden quickly. That creates cracks around moving joints.
Fit and installation deserve equal attention. Measure the shaft diameter, joint diameter, and available length before ordering. Confirm the boot can stretch without excessive force. Check whether clamps, grooves, and tools match the assembly. A poorly fitted boot may leak despite excellent material. Installation space matters too. Tight access can increase labor time and damage the rubber. Avoid twisting the boot during fitting. Small mistakes become expensive later.
Maintenance and total cost reveal the practical choice. Inspect the boot during routine service for splits, loose clamps, or trapped grit. Wipe away abrasive dirt before it reaches the joint. I once selected a lower-cost boot for a dusty application. That shortcut failed after a few months. The replacement required extra labor and a new seal. Now I compare purchase price, installation time, service interval, and possible component damage. Still, my estimates are not perfect. Actual life depends on heat, movement, contamination, and installation quality. A simple inspection record can improve future decisions.
Get a personalized quote tailored to your project needs. Request a quote today and let us help you build with passion.
Looking for a concrete contractor you can trust? Fill out the form below to get our recommendations sent to your inbox.