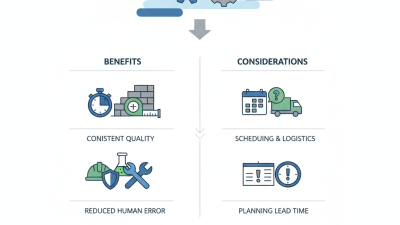
Ordering ready mix concrete is not simply a phone call and a delivery time. It is a coordination decision involving mixture design, distance, weather, access, labor, and placement speed. A strong order begins with accurate project details. Record the required strength, slab thickness, total volume, pour location, reinforcement, finish, and preferred delivery window. Add a small allowance for waste, but avoid careless overordering.
Colin L. Lobo, a respected National Ready Mixed Concrete Association technical expert, has emphasized that concrete performance begins with matching the mixture to placement conditions. That principle should guide every order. A driveway may need different requirements from a high-rise column or a heavily reinforced footing. Ask the supplier about slump, air content, aggregate size, admixtures, and estimated travel time. Confirm whether trucks can reach the site without blocking narrow gates or soft ground.
Small details matter.
On delivery day, check the ticket before discharge. Compare the mix designation, quantity, batch time, and requested specifications. Keep the access route clear. Have enough workers and equipment ready before the first truck arrives. Delays can reduce workability and create cold joints, especially during hot or windy weather.
The process is rarely perfect. Site measurements may be slightly wrong, weather may shift, and a truck may arrive later than planned. That is why experienced contractors confirm assumptions with the producer rather than guessing. When you order ready mix concrete, reliable results come from documented information, realistic timing, and honest communication. A cheaper order can become expensive when preparation is weak.

Before ordering ready mix concrete, define what the project must achieve. Measure the slab, footing, wall, or pavement carefully. Calculate volume in cubic yards or cubic meters, then add a small allowance for waste and uneven ground. I once saw a crew order too little because the excavation sides were not perfectly straight. That error delayed placement.
Specify the required compressive strength and exposure conditions. A residential floor may need different performance from a loading area or exterior walkway. State the desired slump, aggregate size, air content, and cement type when appropriate. Slump affects workability, but adding water on site can weaken the concrete. It seems convenient. It is often a poor correction. Confirm whether reinforcement, pumping, or special finishing methods will affect the mix.
Your delivery plan matters as much as the mix design. Check truck access, gate width, turning space, discharge distance, and the expected placement rate. Keep forms secure and the subgrade compacted before the truck arrives. Discuss weather risks, washout arrangements, and testing procedures with the supplier and site supervisor. Record the order details in writing, including quantity, strength, slump, delivery schedule, and contact information. Small omissions can become expensive. I would also allow extra time, because real sites rarely follow the perfect schedule.
2026 Top Guide: How to Order Ready Mix Concrete?
Choose the Right Ready Mix Concrete Supplier
A reliable supplier protects your schedule before the truck arrives. Check production capacity, delivery distance, and fleet availability. Ask how the supplier handles traffic delays or equipment failure. A nearby plant usually offers better control over travel time. However, location alone does not prove quality.
Request a written mix design for your project. It should show strength class, aggregate size, slump range, and water-cement ratio. Confirm whether approved admixtures are available for hot or cold weather. Ask for recent test records and batch tickets. These documents reveal more than a polished sales promise. Your site engineer should review them.
Delivery planning needs equal attention. Share the pour volume, start time, access width, and placement method. The supplier should calculate truck spacing carefully. One late truck can create a visible cold joint. Confirm the supplier’s procedure for rejected or delayed loads. Clarify payment terms, minimum order quantities, and cancellation rules before ordering.
Do not choose the lowest quote automatically. A cheap mix may require extra labor or repairs later. I once underestimated pump access on a tight site, and the schedule suffered. That mistake still influences my checks. Visit the plant when possible. Observe clean storage areas, maintained equipment, and clear quality procedures. Good suppliers answer specific questions without avoiding technical details.
2026 Top Guide How to Order Ready Mix Concrete
Requesting a quote is more than asking for a price per cubic metre. Share slab dimensions, estimated volume, strength class, placement date, site address, and access limits. Add a small allowance for spillage and uneven ground, but calculate it carefully. Over-ordering wastes money. Under-ordering creates a cold joint.
Ask each supplier to itemize concrete, delivery, pumping, waiting time, taxes, and weekend charges. Request the proposed mix design, not just a product description. Confirm cement content, water-to-cement ratio, aggregate size, admixtures, slump, air content, and strength at the stated test age. Your structural drawings or engineer’s specification should control these choices. A cheaper quote may hide a different performance requirement.
Check the quote against the pour plan. Can trucks reach the discharge point? Is the road strong enough? Confirm the delivery window, truck spacing, cancellation terms, and washout arrangement in writing. On site, verify the batch ticket before placement, including mix code, volume, and dispatch time. I once focused too heavily on volume and missed a restricted gate, which delayed placement. That mistake changed my checklist. Still, weather and traffic can defeat good planning, so keep a practical contingency. If the mix design changes, pause and obtain written approval from the responsible professional.
2026 Top Guide: How to Order Ready Mix Concrete?
Schedule Delivery and Prepare the Pouring Site
Ordering ready-mix concrete is more than choosing a volume and delivery time. Measure the slab, footing, or walkway carefully, then add a modest allowance for waste. A small shortage can stop the pour. Excess concrete creates disposal and cost problems. Confirm the required strength, aggregate size, slump, and placement method with your engineer or contractor. Written details reduce confusion between the site and the mixing facility.
Delivery timing needs practical planning. Check the truck route, gate width, overhead cables, and turning space before booking. Keep the access road firm and clear. Reserve enough trucks to maintain a steady pour without long waiting periods. Ask about the expected arrival window, weather policy, and cancellation terms. Assign one person to receive calls and guide each truck. Good communication matters.
Prepare the pouring site before the first vehicle arrives. Compact the subgrade, install forms securely, and check reinforcement spacing and cover. Remove standing water, loose soil, tools, and unnecessary workers. Place screeds, shovels, vibrators, and curing materials nearby. Provide a safe washout area that will not contaminate drains or soil. Keep electricity and lighting ready for changing conditions.
Plans are rarely perfect. I have seen minor access issues delay an otherwise organized pour. A final site walk-through, completed shortly before delivery, can reveal blocked gates, soft ground, or missing tools. Do not rely on memory alone. Use a simple checklist and record any changes before the truck leaves.
Typical planning benchmarks for scheduling delivery and preparing the pouring site. Confirm local supplier requirements, mix availability, traffic conditions, and project size before placing the order.
Plan the concrete order at least 24–48 hours ahead when possible. The site should be fully prepared before the truck arrives, including forms, reinforcement, access, labor, tools, and a clear discharge area.
2026 Top Guide: How to Order Ready Mix Concrete?
Inspect, Receive, and Place the Ready Mix Concrete
Before ordering, confirm the pour area, access route, volume, and required strength. Measure forms carefully, then add a small allowance for waste and uneven ground. A site supervisor should check reinforcement, formwork, embedded items, and weather. Keep the discharge point clear. Ask for the mix design, estimated arrival time, slump range, and curing guidance. These details prevent rushed decisions when the truck arrives.
At delivery, inspect the ticket before unloading. Check the mix type, batch time, quantity, and requested specifications. Look inside the drum for excessive water or signs of early stiffening. Do not solve poor workability by adding water without technical approval. Test slump and temperature when project procedures require it. Record delivery times and unusual conditions with photos. A careful receiver protects both quality and accountability.
Place concrete continuously where possible, using short drops to reduce segregation. Guide the flow around reinforcement without dragging the mix across the form. Use vibration carefully; too little leaves voids, while too much can separate materials. Start curing promptly after finishing, especially in hot, dry, or windy weather. I once underestimated a narrow access path, and the crew lost valuable minutes. That mistake taught me to walk the route with the delivery team beforehand. Even experienced crews can miss a simple obstruction.
| Step | Stage | What to Check or Order | Recommended Action | Typical Acceptance Information | Record or Reference |
|---|---|---|---|---|---|
| 1 | Define the order | Concrete volume, strength class, exposure condition, aggregate size, slump, air content, delivery schedule, and placement location. | Prepare a written purchase specification before requesting a quotation. Confirm whether the required strength is specified at 28 days or another test age. | Use the project drawings, structural specifications, and applicable local code. Do not select a mix only by compressive strength. | Approved mix submittal and purchase order. |
| 2 | Calculate quantity | Length, width, thickness, irregular shapes, waste allowance, and separate placements. | Calculate the geometric volume, convert it to the supplier’s ordering unit, and add a practical allowance for spillage, uneven subgrade, and measurement variation. | For a rectangular slab: volume = length × width × thickness. Verify the final quantity against site conditions before dispatch. | Quantity calculation sheet and site measurement. |
| 3 | Confirm site readiness | Formwork, reinforcement, embedded items, subgrade, access, lighting, pump location, and finishing equipment. | Complete the pre-pour inspection. Ensure forms are stable, reinforcement is supported at the specified cover, and the discharge route is clear. | No active leaks, unsafe access, standing water, loose debris, or unapproved changes should remain at the placement area. | Pre-pour checklist and inspection approval. |
| 4 | Schedule delivery | Required arrival time, truck access, discharge rate, traffic restrictions, weather, and contingency arrangements. | Order enough delivery capacity to maintain a continuous placement where possible. Assign a person to coordinate trucks and site entry. | The delivery sequence should match the crew’s placing, vibrating, screeding, and finishing capacity. | Delivery plan and contact list. |
| 5 | Inspect the delivery ticket | Batch time, truck identification, concrete quantity, mix designation, water added at the plant, admixtures, and revolutions. | Compare the ticket with the approved order before discharge. Record any water or admixture added on site and obtain authorization when required. | The ticket should identify the delivered mixture and provide traceability for the load. | Signed delivery ticket and load log. |
| 6 | Check fresh concrete | Appearance, consistency, temperature, slump, air content where specified, and sampling location. | Sample and test according to the project quality plan. Do not use visual appearance alone to accept or reject a load. | Test results must fall within the approved mix and project specification. Temperature limits depend on the specified materials and weather conditions. | ASTM C172, ASTM C143, ASTM C1064, and ASTM C231 or ASTM C173 where applicable. |
| 7 | Receive the load | Discharge condition, elapsed time, consistency, segregation, contamination, and unauthorized water addition. | Accept, conditionally accept, or reject the load using the project’s documented criteria. Never add water informally to correct slump. | Any permitted adjustment must be measured, recorded, thoroughly mixed, and completed within the governing specification limits. | Load acceptance form and adjustment record. |
| 8 | Place the concrete | Drop height, placement sequence, layer thickness, segregation, construction joints, and reinforcement displacement. | Place as close as practical to the final position. Use controlled lifts and avoid dragging concrete long distances with a vibrator or rake. | Concrete should remain uniform and should not be allowed to segregate or accumulate in isolated piles. | Placement log and location-based inspection notes. |
| 9 | Consolidate and finish | Internal vibration, surface elevation, screeding, bull floating, final texture, edges, and joints. | Consolidate systematically without over-vibrating. Finish only after bleed water has evaporated or been removed according to the specification. | Do not work excess water into the surface. Maintain specified slopes, levels, joint layout, and surface profile. | Finishing checklist and elevation records. |
| 10 | Cure and protect | Moisture retention, curing compound, temperature exposure, traffic, rain, wind, and early loading. | Begin curing as soon as the surface will not be damaged. Protect the concrete from rapid drying, freezing, vibration, and premature traffic. | Use the curing method and duration stated in the project specification. Maintain protection until the required strength or service condition is achieved. | Curing log, weather record, and access-control record. |
| 11 | Verify strength | Test specimens, identification, curing conditions, test age, and laboratory reports. | Prepare, label, transport, cure, and test specimens under the approved quality-control procedure. | Compare results with the specified acceptance criteria; investigate low results through the engineer or testing agency rather than making assumptions from one result. | ASTM C31, ASTM C39, test reports, and nonconformance records where needed. |
Note: Slump, air content, temperature, strength, delivery time, and curing requirements must always follow the approved project specifications and applicable local standards.
Get a personalized quote tailored to your project needs. Request a quote today and let us help you build with passion.
Looking for a concrete contractor you can trust? Fill out the form below to get our recommendations sent to your inbox.